Product categories
Product categories and tags group products together, product categories can be displayed in the shop. Categories are managed from the Products > Categories screen.

Categories can also be reordered by dragging and dropping – this order will be used by default on the front end whenever the categories are listed. This includes the subcategory view on product pages.
When you add a new product through Products > Add Product, you’ll be able to select this new product category from the list
Product tags
Tags are another way to relate products to each other, next to product categories. Tags can be added similarly to adding product categories and work in exactly the same way as blog post tags.
Product Attributes
Attributes are pieces of data that can add more technical information to a product and help users refine your catalog while browsing/searching.
Product attributes can be used to make a distinction between the different variations of the same product.
For example, if you’re selling clothing, two logical attributes will be “color” and “size”, so people can search across categories for a color that fits their style and type, and for clothing that is available in their size.
Adding global product attributes to your store
Setting up attributes themselves uses an interface you are familiar with. It’s recommended that you set up any attributes you will use over and over in this way. Navigate to Products > Attributes where you’ll find the following screen:
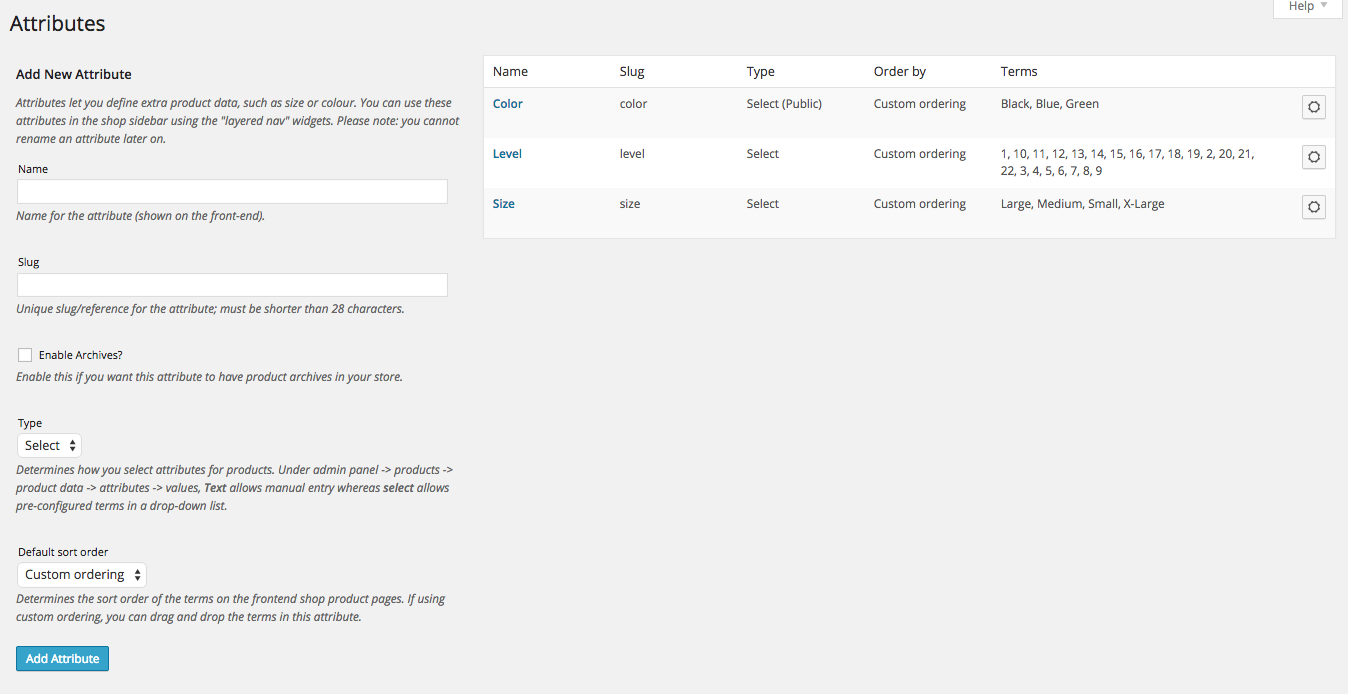
Here you can quickly and easily add attributes and their terms.
- Add a Name.
- Optionally, add a Slug; this is the URL-friendly version of the name.
- Enable Archives if wanted. If enabled, you will be able to view a page with all products in having this attribute. For example, if you have this enable, and “black” is one of the options under “color”, you can add
http://yourstore.com/pa_color/black/to your menu to only display the black clothing –pastands for “product attribute”. - Choose the Type. This is used in the products. If you want to have the same attribute values for your whole store, you can choose “Select”. On the individual product, you’ll be able to select the attributes. If you choose “Text”, you’ll be able to type new values to the attributes.
- Choose the Default sort order.
- Select Add Attribute. The attribute will now be added in the table on the right, but without values.
- Select the gear icon to add attribute values. You’ll see “Configure terms” when you hover over it.
- Next, you’ll be able to Add New “Attribute name”, where “Attribute name” will automatically take the name you’ve given to the attribute in the previous step.
- Add as many values as you want, they are saved automatically.