A blog can be an effective way to reach your audience. You can blog about anything; your company, interesting things in your city, or anything you think will interest people. Each entry in a blog is called a ‘blog post’ or ‘post’ for short.
Managing your blog posts
Click on the Posts admin sidebar button to view all of your blog posts. You will be presented with the following window. This is almost identical to the list of web pages, except that this lists all blog posts instead of web pages.
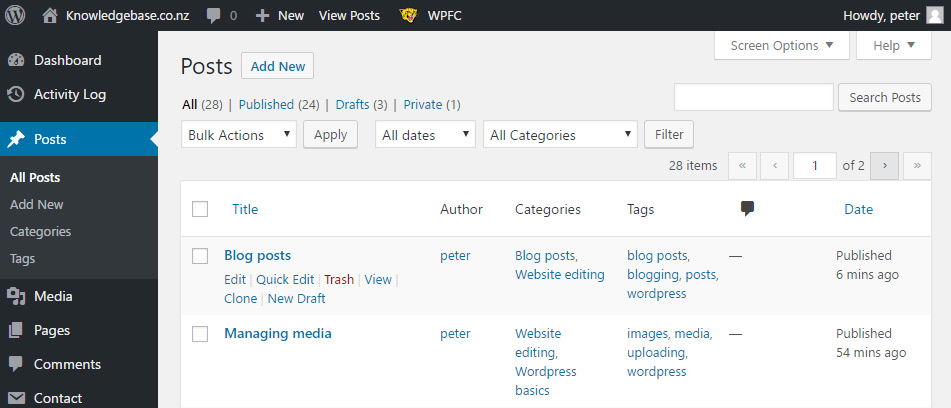
Here you can perform the following:
- View a list of all blog posts you currently have
- Add a new blog post
- Add or view a new blog post category
- View or edit an existing blog post
 Adding a new blog post
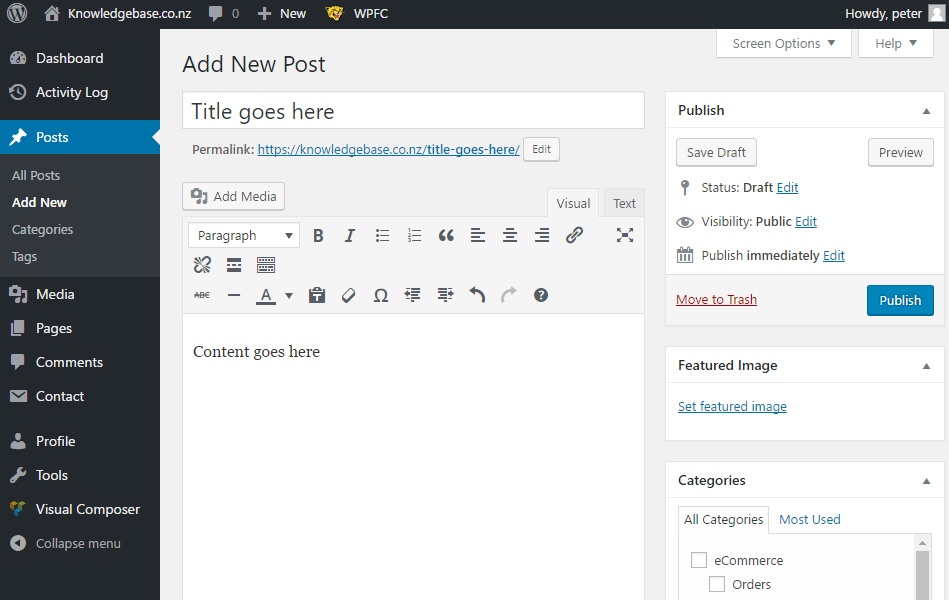
- On the blog posts page, click the Add new button next to the Posts title.
- Input the title of your blog post.
- Add content to your post including text and images in the box below the title page. Style the text using the text editor.
- Choose or add a category or categories the post belongs in, by selecting the check box next to the relevant category, or click Add New and input the name for a new category.
- (optional) Set the featured image. This is similar to adding an image, except instead of clicking ‘insert into post’, you click Set as featured image. This is an image that appears as a thumbnail of each blog post when they are being displayed on the blog page (this may vary for each website). This should convey the message of your blog post. Check the dimensions of other featured images to ensure yours will fit. If the featured image is not supplied, no image will be displayed.
- (optional) Add an excerpt. This is a small summary of your blog post, to be displayed on the blog page. Add what text you want into the excerpt box. If this is not set, the first 55 words of the post will be displayed as an excerpt.
- Preview by clicking the preview button and ensuring it appears as you would like it to.
- It is important to remember to click the Publish button once happy with the blog post, otherwise the post will not be visible to the public.
Editing a blog post
Editing a blog post is very similar to adding a blog post, and to editing a simple web page, except the blog has already been created.
- On the All posts page, click on the title of the blog post you want to edit.
- The edit post page will load, allowing you to make any changes you require.
- Preview your changes, then update the page using the Update button.
Deleting a blog post
- Open the edit blog post by clicking an edit post button.
- Click the Move to trash button, which sits next to the Update/Publish button.
Categories
Categories group blog posts together, allowing users to to find all blog posts related to a similar topic.
Adding a new blog category
This can be done when creating a blog, as explained in step 4 of ‘add a blog post’, alternatively a blog category can be created from the blog All posts page.
- Click the Categories button on the sidebar under the Posts section.
- Under Add new category, give the category a name, and category parent if applicable.
- Click Add new category, the category will now be added and can be selected when creating a blog post. If a category has no blog posts attached, it will stay hidden.